Your concrete patio is finally free of dirt and grime, leaving you at a crossroads: do you tackle the sealing yourself or call in a professional? The DIY route can seem like a great way to save money, but it comes with its own set of challenges. Choosing the wrong product or applying it incorrectly can lead to a finish that fails quickly, forcing you to do it all over again. On the other hand, hiring a pro offers peace of mind and a guaranteed result. The decision of how to approach sealing concrete patio after power washing depends on your budget, your timeline, and your confidence in the project. This guide will help you weigh the pros and cons, so you can make the best choice for your home.
A SUPERIOR CLEAN
Ready to Refresh
Your Property?
Gulf2Bay Softwash provides safe, eco-friendly exterior cleaning services that remove dirt, mold, mildew, and algae while protecting your home or business.
Key Takeaways
- Ensure your concrete is completely dry: After power washing, wait at least 24 to 48 hours before sealing. Applying sealer to a damp surface traps moisture, which can cause bubbling, peeling, or a cloudy finish.
- Select the right sealer and apply it in thin coats: Choose a product based on your climate and desired finish, like matte or gloss. When applying, use a roller or sprayer to create thin, even layers to prevent a sticky, uneven result.
- Perform regular maintenance to extend the life of the seal: Keep your patio looking great with simple weekly sweeping and spot cleaning. Plan to reseal every one to two years, or when you notice water no longer beading on the surface, to maintain protection.
Why Seal Your Concrete Patio?
After you’ve gone to the trouble of power washing your patio, it’s tempting to call it a day. But the job isn’t quite finished. Sealing your concrete is the crucial final step that protects all your hard work. Think of it less as an extra task and more as an essential part of the cleaning process. An unsealed patio is vulnerable to stains, weather damage, and daily wear and tear. By applying a quality sealer, you’re not just making your patio look good for the moment; you’re investing in its beauty and durability for years to come. It’s the best way to ensure your outdoor space stays in top condition, ready for whatever summer barbecues or quiet morning coffees you have planned.
Protect From Stains and Moisture
Concrete may look solid, but it’s actually a porous material, kind of like a hard sponge. Without a protective barrier, it will soak up anything that lands on it. This means spilled wine from a party, grease from the grill, or even wet leaves can leave behind ugly, permanent stains. Sealing your patio creates an invisible shield on the surface, preventing these spills from seeping in and giving you time to clean them up. More importantly, a sealer blocks out moisture. In a place like New York, where we see plenty of rain and snow, this is critical. Water that gets into the concrete can lead to mold, mildew, and efflorescence (that chalky white residue), but one of our eco-friendly sealers keeps it all out.
Extend Your Patio’s Lifespan
Protecting your patio from moisture does more than just prevent stains; it significantly extends its life. When water penetrates unsealed concrete and then freezes, it expands. This freeze-thaw cycle puts immense pressure on the concrete from within, leading to cracks, chipping, and spalling over time. A sealer acts as a waterproof layer, stopping this destructive process before it starts. It helps your patio withstand heavy foot traffic, harsh weather, and the sun’s UV rays, which can cause the surface to fade and weaken. Taking the time for proper concrete cleaning and sealing is a proactive step that helps you avoid costly repairs and ensures your patio remains a stable, safe, and enjoyable part of your home for many seasons.
Improve Its Look and Value
Beyond all the practical protection, sealing your concrete patio simply makes it look better. A quality sealer enhances the natural color and texture of the concrete, giving it a rich, finished appearance that looks clean and polished. You can even choose a specific finish to match your style, from a subtle matte look to a high-gloss wet look that really makes a statement. This instant visual upgrade can transform your entire outdoor area, making it feel more inviting and well-maintained. This not only adds to your personal enjoyment of the space but also contributes to your home’s curb appeal and overall value. It’s a simple finishing touch that delivers a major impact.
How Long to Wait After Power Washing
After you’ve put in the effort to power wash your patio, you’re probably eager to get the sealer on and finish the job. But this is where a little patience goes a long way. Applying sealer to concrete that isn’t completely dry is one of the biggest mistakes you can make. When you seal damp concrete, you trap moisture underneath the surface. This trapped water can cause the sealer to look cloudy, bubble up, or peel away, completely undoing all your hard work and wasting product.
Think of this waiting period as a crucial part of the process, not just a delay. Giving your patio enough time to dry ensures the sealer can properly penetrate and bond with the concrete. This creates a durable, protective layer that will last for years. The exact time you need to wait depends on a few factors, but getting it right is the key to a beautiful, long-lasting finish.
Wait at Least 24 Hours
As a general rule, you should wait at least 24 hours after power washing before you even think about sealing. Concrete is porous, and it soaks up a surprising amount of water during a deep clean. It needs time for all that absorbed moisture to evaporate from within, not just from the surface. In many cases, especially in humid or cool weather, you may need to wait longer, sometimes up to 48 or 72 hours. It’s always better to give it an extra day if you’re unsure. Rushing this step can cause problems, so allowing the concrete to be completely dry is non-negotiable for a successful seal.
How to Tell if It’s Completely Dry
Your patio might look and feel dry to the touch, but moisture could still be hiding beneath the surface. To be sure it’s ready for sealing, do a few simple checks. Pay close attention to low spots, expansion joints, and areas near gardens or downspouts, as water tends to collect there. A great way to test for dampness is to press a clean paper towel firmly onto a few different spots on the patio. If the towel picks up any moisture, you need to wait longer. For a more technical approach, you can use a moisture meter to get an exact reading, but the paper towel test is usually reliable enough for most DIY projects.
Check the Weather Forecast
Your patio isn’t the only thing that needs to be dry; the weather forecast plays a huge role, too. Before you start, check the weather for the next 24 to 48 hours. You need a clear, dry window for the sealer to be applied and to cure properly. Applying sealer right before it rains can wash it away or leave it splotchy. High humidity is also a problem, as it can dramatically slow down the curing process and affect the final finish. The ideal time to start sealing is on a clear, sunny morning when you have a couple of dry days ahead of you. If the forecast looks unpredictable, it might be a good time to get a quote from a professional who can manage the project for you.
What Are the Different Types of Concrete Sealers?
Once your patio is sparkling clean and completely dry, the next step is choosing the right sealer. Walking into a hardware store can feel overwhelming with all the options, but it really comes down to a few key differences. The best sealer for your patio depends on the look you want, how you use the space, and the type of weather it needs to stand up to. Let’s break down the main types so you can pick the perfect one for your project.
Penetrating vs. Film-Forming Sealers
Think of this as the first big decision you’ll make. Do you want a sealer that works from the inside out or one that creates a protective shell on top? Penetrating sealers soak deep into the concrete’s pores to block water and contaminants without changing the surface’s natural look and texture. They are fantastic for driveways and walkways because they provide durable protection without making the surface slippery. In contrast, film-forming sealers create a visible layer on the concrete. This barrier shields the surface from stains and wear while often adding a nice sheen, from a subtle satin to a high-gloss finish. If you have a decorative or stamped concrete patio, a film-forming sealer can really enhance its color and pattern.
Acrylic, Polyurethane, and Epoxy Options
Within the film-forming category, you’ll find a few common chemical types. Acrylic sealers are a popular choice for homeowners because they’re easy to apply and affordable. They offer good protection from water and are available in a variety of finishes. Polyurethane sealers are a step up in durability, providing a tougher finish that holds up better against scratches and chemicals, making them great for high-traffic patios. For the most robust protection, there are epoxy sealers. These create a thick, incredibly hard layer that’s almost impenetrable, which is why you often see them in garages and commercial spaces. While they offer maximum defense, they can be more difficult to apply and may not be necessary for a typical residential patio.
Match the Sealer to Your Climate and Use
Here in New York, we deal with everything from hot, humid summers to freezing winters. This is where choosing wisely really pays off. The freeze-thaw cycle can be brutal on concrete, causing water that has soaked in to freeze, expand, and create cracks. A penetrating sealer is an excellent choice for our climate because it stops water absorption in the first place. If you prefer the look of a film-former, make sure it’s a “breathable” formula that won’t trap moisture. At Gulf2Bay, we often use professional-grade, eco-friendly Trident products that are designed to handle local weather conditions while protecting your investment. Ultimately, consider your patio’s daily life. Is it a busy hub for kids and furniture, or a quiet decorative space? Your answer will guide you to the perfect sealer.
How to Choose the Right Sealer
Picking a sealer isn’t a one-size-fits-all decision. The right product depends on your concrete’s age, local weather, and the look you want. Think of it like choosing a coat; it needs to fit well, stand up to the elements, and match your style. The right choice protects your patio for years. Let’s walk through the three key things to consider to find the perfect sealer for your space.
Check Your Concrete’s Condition
First, take a good look at your patio. Is the concrete new or has it seen a few seasons? Its current condition is a major factor in what sealer will work best. Sealing is essential because it protects the surface from moisture, stains, and damage, helping your patio last longer. For older, porous concrete, a penetrating sealer is a great choice as it soaks deep to protect from within. If you’re unsure about its condition, getting a professional opinion can help you avoid costly mistakes before you start.
Consider Sun and Weather Exposure
Your patio is constantly exposed to the elements, especially here in New York. From harsh winter freezes to intense summer sun, the weather plays a huge role in how your concrete holds up. A good sealer acts as a shield against heavy foot traffic, UV rays that cause fading, and moisture that can lead to cracking. If your patio gets a lot of direct sunlight, you’ll want a sealer with excellent UV resistance to prevent yellowing. For patios facing lots of rain and snow, water repellency is key to prevent damage from freeze-thaw cycles. We use high-quality joint stabilizing sealers designed for these exact challenges.
Decide on Your Preferred Finish
Finally, how do you want your patio to look? This is where you can bring your personal style into the project. Concrete sealers come in two main types: penetrating and film-forming. Penetrating sealers soak into the concrete without creating a surface film, so they won’t change the look or texture of your patio. They offer invisible protection, which is perfect if you love the natural, matte appearance of your concrete. Film-forming sealers, on the other hand, create a protective layer on the surface. These can give your patio anything from a high-gloss, “wet” look to a more subtle satin or matte finish. This topcoat can enhance the color, but remember that high-gloss finishes can become slippery when wet.
What Tools and Materials Do You Need?
Getting your patio sealed is a bit like painting a room. Having the right tools on hand before you start makes the process smoother and gives you a much better result. The most important material, of course, is the sealer itself. Choosing a high-quality product, like the eco-friendly Trident products we use, is the first step. Once you have your sealer picked out, it’s time to gather the rest of your gear. Let’s walk through exactly what you’ll need to get the job done right.
Application Tools
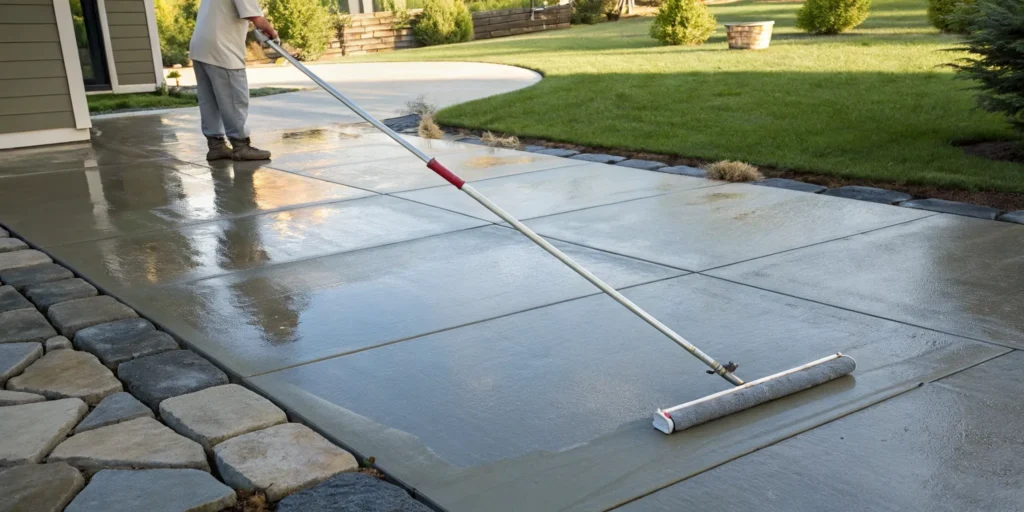
To get the sealer onto the concrete, you have two main options: a roller or a sprayer. A simple paint roller with a medium-nap cover and an extension pole works great, giving you control to apply thin, even coats. For larger patios, a dedicated pump sprayer designed for sealants is a huge time-saver. Just be sure it’s made for sealers, as the chemicals can damage a standard garden sprayer. Whichever you choose, keep a small paintbrush on hand for cutting in along edges or getting into tight corners. This ensures you get complete coverage without any missed spots.
Safety and Prep Gear
Working with sealers requires some safety prep. You’ll want chemical-resistant gloves and safety glasses to protect your skin and eyes. Depending on the sealer and ventilation, a respirator is also a smart idea. Before you begin, protect the areas surrounding your patio. Use painter’s tape and plastic sheeting to cover siding, doorways, and any nearby plants. This small step saves a big cleanup headache. Remember, the most important prep is selecting a sealant that works for your concrete and climate, a task our team handles with care on every project.
Cleaning Supplies
Even after power washing, your patio can collect new dust or leaves. Before you seal, the surface must be perfectly clean, because sealing over dirt traps it for good. A quick pass with a leaf blower or a stiff-bristled broom is usually all you need. This is also your final chance to ensure the concrete is completely dry. Pay special attention to low spots or joints between pavers where water might hide. A pristine, dry surface is the only way to guarantee your sealer will bond correctly. If the job feels too big, our professional cleaning services can get your patio ready.
How to Seal Your Concrete Patio: A Step-by-Step Guide
Alright, your patio is clean and you’ve picked the perfect sealer. Now for the main event. Applying sealer isn’t complicated, but it does require attention to detail to get that flawless, long-lasting finish. Following these steps will help you get professional-quality results and ensure your patio is protected for years to come. Let’s walk through the process together.
Step 1: Clean and Prep the Surface
You can’t get a great finish without a perfectly clean slate. Before you even think about opening that can of sealer, your concrete patio needs to be completely free of dirt, stains, and grime. A thorough power wash is the best way to handle this, as it removes any buildup that could prevent the sealer from adhering properly. If you’re dealing with stubborn stains or mildew, a professional concrete cleaning can restore the surface. After cleaning, patience is your best friend. The concrete must be 100% dry, which can take anywhere from 24 to 72 hours. Sealing a damp surface traps moisture, leading to a cloudy finish, bubbles, or peeling down the road.
Step 2: Apply the Sealer Evenly
When you’re ready to apply, remember this simple rule: thin coats are always better than thick ones. Using a roller or a pump sprayer, apply a light, even layer of sealer across the entire patio. Work in manageable sections to maintain a wet edge and avoid overlap marks. Applying too much sealer at once can cause it to puddle, which leaves behind milky white spots once it dries. If your concrete is very porous and absorbs the first coat quickly, you may need a second. Just be sure to wait the recommended time between coats, which you can find in the product instructions for the sealer you’re using.
Step 3: Let It Dry and Cure
Once the final coat is on, it’s time to let the sealer work its magic. It might feel dry to the touch in a few hours, but it needs to fully cure to form a hard, protective shell. This curing process typically takes 24 to 48 hours, so keep foot traffic, pets, and furniture off the patio during this time. Before you start moving your patio chairs back, do a final check for any damp spots, especially in joints or low areas where water might have pooled. Giving your patio this uninterrupted time to cure is the final, crucial step to ensuring a durable and beautiful finish that will last.
Common Sealing Mistakes to Avoid
You’ve done the hard work of cleaning your patio, and you’re on the home stretch. Sealing is the final step, but a few common missteps can undo all your effort. Getting a smooth, durable finish is all about avoiding these simple but critical errors. Taking your time and paying attention to the details here will ensure your patio looks fantastic and stays protected for years. Let’s walk through what not to do, so you can get the professional-looking results you want.
Sealing a Wet or Dirty Surface
I know how tempting it is to jump right into sealing after you’ve finished power washing, but patience is key here. Applying sealer to a damp surface is one of the biggest mistakes you can make. Trapped moisture can’t escape, which causes the sealer to bubble, peel, or turn cloudy. Your concrete needs to be completely dry, which usually takes at least 24 to 48 hours. Before you start, make sure the surface is also perfectly clean. Any dirt, dust, or leaves left behind will get trapped under the sealer forever, ruining that pristine look you worked so hard for. A thorough exterior cleaning is the only way to prep for a perfect seal.
Using Too Much Sealer
When it comes to concrete sealer, more is definitely not better. It’s easy to think a thick coat will provide extra protection, but it usually just causes problems. Over-applying sealer can create puddles that take forever to dry, leaving behind a sticky, uneven finish. A heavy coat can also make the surface dangerously slippery when wet and may appear cloudy instead of clear. The goal is to apply thin, even coats. A roller or sprayer helps with this. If the concrete is very porous and soaks up the first coat quickly, it’s better to let it dry and apply a second thin coat rather than pouring on a single thick one. Using quality joint stabilizing sealers also ensures great coverage without overdoing it.
Working in the Wrong Temperature
Your local weather forecast is one of your most important tools for this project. Sealer is sensitive to temperature and humidity, so timing is everything. Applying it in direct, hot sunlight can cause it to dry too fast, before it has a chance to properly bond with the concrete. On the other hand, if it’s too cold, the sealer won’t cure correctly. Aim for a day with moderate temperatures, ideally between 50 and 85 degrees Fahrenheit. You should also make sure there’s no rain in the forecast for at least 24 hours and avoid sealing when humidity is high. If finding that perfect window of time seems tricky, it might be best to have a professional team handle it.
How to Maintain Your Sealed Patio
You’ve put in the work to power wash and seal your patio, and it looks fantastic. Now, let’s keep it that way. Maintaining your sealed concrete is much easier than starting from scratch. With a few simple habits, you can protect your investment and keep your outdoor space ready for relaxation or entertaining at a moment’s notice. Think of it less as a chore and more as a simple routine to preserve the beautiful finish you’ve achieved. A little regular care prevents dirt, stains, and wear from taking hold, ensuring your patio remains a highlight of your home for years.
Simple Cleaning Tips
Keeping your sealed patio looking fresh doesn’t require a lot of effort, just consistency. Start by sweeping it weekly to clear away leaves, dirt, and other debris before they get ground into the surface. Once a month, give it a gentle wash with mild soap and water to remove any light grime. It’s important to clean spills as soon as they happen, especially oils or acidic liquids, to prevent them from challenging the sealer and causing a stain. If you have pavers, regularly pull any weeds that pop up in the joints. This not only looks better but also prevents roots from causing damage. These simple habits are easy to do yourself and make a huge difference in preserving your patio’s appearance.
Know When It’s Time to Reseal
Even the best sealer won’t last forever. As a general rule, you should plan to reseal your patio every one to two years. However, this can change depending on factors like how much foot traffic your patio gets and the harshness of New York weather. A key sign that it’s time to reseal is when water stops beading on the surface and starts soaking in. You might also notice the color looking dull or faded. Don’t wait for the sealer to wear away completely. Being proactive and resealing before you see significant wear is the best way to protect the concrete underneath from moisture and stains. If you’re unsure, we can help you get a quote for a professional inspection and resealing.
Make Your Sealer Last Longer
Want to stretch the time between resealing jobs? A few smart choices can help your sealer last longer. First, remember that the quality of the sealer itself makes a big impact. Using high-performance, eco-friendly products like joint stabilizing sealers provides a more durable, long-lasting barrier from the start. To protect the finish, place mats at doorways to reduce the amount of abrasive dirt tracked onto the patio, and use pads under the legs of heavy furniture to prevent scratches. If you notice a small area of wear, address it quickly, but make sure the surface is perfectly clean and dry before doing any touch-ups. Following these tips helps preserve that beautiful, protective finish you worked so hard to create.
DIY or Hire a Pro?
Deciding whether to seal your concrete patio yourself or hire a professional comes down to balancing cost, time, and the quality of the final result. While a DIY project can feel rewarding, sealing concrete requires precision to get it right. Let’s walk through the key things to consider so you can make the best choice for your home and your schedule.
When to Call a Professional
If your patio is large, has stubborn stains, or you simply want a guaranteed, flawless finish, calling in an expert is the way to go. Professionals have the experience to properly diagnose your concrete’s condition and select the perfect sealer for New York’s specific climate challenges. They also use commercial-grade equipment that ensures a smooth, even application, which is tough to replicate with store-bought tools. A professional service is an investment in getting the job done right the first time, protecting your patio for years and saving you from potential DIY mishaps. For bigger jobs or complex surfaces, a team of exterior cleaning experts can deliver results that last.
What to Know Before You DIY
If you’re set on tackling this project yourself, your success will depend on careful preparation and patience. Before you even think about opening a can of sealer, the concrete must be perfectly clean and completely dry. Any trapped moisture or debris will compromise the seal. When you’re ready to apply, remember that less is more. Use a roller or sprayer to apply the sealer in thin, even coats. A thick application can lead to a blotchy finish and prevent the sealer from curing properly. Finally, respect the drying time. Most sealers need at least 24 to 48 hours to fully cure before you can walk on the surface or move furniture back.
Comparing the Costs and Results
At first glance, DIY seems like the cheaper option. You just need to buy the sealer and a few tools. However, it’s important to factor in the whole picture. Professionals often have access to higher-quality, more durable sealers that offer better long-term protection. While you’ll pay for labor, you’re also paying for expertise and a guarantee. A poorly sealed patio might need to be stripped and redone, costing you more time and money down the road. Think about the value of your weekend, too. Getting a free quote can give you a clear comparison and help you decide if the convenience and superior result of a professional job is the right investment for you.
A SUPERIOR CLEAN
Ready to Refresh
Your Property?
Gulf2Bay Softwash provides safe, eco-friendly exterior cleaning services that remove dirt, mold, mildew, and algae while protecting your home or business.
Frequently Asked Questions
When is the best time of year to seal my patio? The best time to seal your patio is during a stretch of clear, mild weather. In New York, this usually means late spring or early fall. You want to avoid the intense heat of mid-summer, which can cause the sealer to dry too quickly, and the cold temperatures of winter, which prevent it from curing correctly. Aim for a few consecutive days with temperatures between 50 and 85 degrees Fahrenheit and low humidity.
Do I really have to reseal my patio every couple of years? The one to two year timeframe is a general guideline, but your patio will tell you when it’s ready. The easiest way to check is to sprinkle some water on the surface. If the water beads up like on a freshly waxed car, your sealer is still working. If the water soaks in and darkens the concrete, it’s time to reseal. Being proactive and resealing before the old coat completely wears away is the best way to keep the concrete itself protected from stains and water damage.
Will sealing my concrete make it slippery when it gets wet? This depends entirely on the type of sealer you choose. Penetrating sealers soak into the concrete without forming a surface film, so they won’t change the texture or make it slippery. Film-forming sealers, especially those with a high-gloss finish, can reduce traction. If you love that wet look, you can add a non-slip additive directly into the sealer to provide grip without sacrificing the shine.
What happens if I seal my patio when it’s still a little damp? Sealing concrete that isn’t completely dry is the fastest way to ruin the project. When you apply sealer over a damp surface, you trap moisture underneath. This trapped water can’t escape, which often causes the sealer to look cloudy or milky. It can also lead to bubbling and peeling, meaning you’ll have to strip the entire surface and start over. It’s always better to wait an extra day to be sure it’s bone dry.
Is a penetrating or film-forming sealer better for a New York climate? Both types can be excellent choices for our climate, as long as you select a quality product. Penetrating sealers are fantastic for protecting against our harsh freeze-thaw cycles because they stop water from absorbing into the concrete in the first place. If you prefer the enhanced color and sheen of a film-forming sealer, just make sure you choose a “breathable” formula. This allows any trace amounts of moisture vapor to escape instead of getting trapped.