Over time, every home develops a layer of dirt, pollen, and even green algae on its siding. While pressure washing seems like the obvious fix, it’s not as simple as just pointing and spraying. The wrong approach can leave you with a streaky finish or, worse, costly damage. That’s why understanding the fundamentals is so important. This article breaks down exactly how to pressure wash a house the right way. We’ll explore the difference between high-pressure cleaning and gentler soft washing methods, helping you choose the best technique to protect your property while making it shine like new.
A SUPERIOR CLEAN
Ready to Refresh
Your Property?
Gulf2Bay Softwash provides safe, eco-friendly exterior cleaning services that remove dirt, mold, mildew, and algae while protecting your home or business.
Key Takeaways
- Set the stage for a safe wash: Before you start, always clear the area of furniture, cover plants and electrical outlets, and wear proper safety gear. This simple prep work is the best way to prevent accidental damage to your property and yourself.
- Adjust your pressure for each surface: Using the right water pressure is essential for a damage-free clean. Reserve high pressure for durable materials like concrete, and use a gentler, low-pressure approach for more delicate surfaces like siding, wood, and painted trim.
- Master the right washing technique: For a streak-free finish, apply your cleaning solution from the bottom up, but always rinse with clean water from the top down. Keep the nozzle moving in smooth, even strokes to avoid leaving lines or marks on your home.
What Is Pressure Washing?
Pressure washing is a deep-cleaning method that uses a high-pressure stream of water to remove dirt, grime, mold, and loose paint from exterior surfaces. Think of it as a super-powered version of your garden hose, capable of blasting away years of buildup from driveways, siding, and decks. It’s an incredibly effective way to restore the look of your property and prepare surfaces for painting or sealing.
However, that power needs to be handled with care. Different surfaces require different levels of pressure and specific cleaning solutions to avoid damage. This is where the distinction between high-pressure washing and soft washing becomes important. While high pressure is great for tough surfaces like concrete, a gentler approach called soft washing is better for more delicate materials like roof shingles, vinyl siding, and wood. Soft washing uses specialized, eco-friendly cleaning solutions to kill organic growth and lift away dirt, followed by a low-pressure rinse. This technique provides a thorough clean without the risk of stripping paint or damaging your home’s exterior. Understanding which method is right for each part of your home is key to getting a great result.
Why Your Home Needs It
Regularly cleaning your home’s exterior does more than just make it look good; it’s a crucial part of property maintenance. Over time, your siding, deck, and walkways accumulate dirt, pollen, algae, and mildew. These substances aren’t just unsightly, they can cause real damage. Mold and mildew can eat away at paint and siding, leading to costly repairs, and can even impact your family’s health by affecting the air quality around your home. A professional house washing service removes these harmful contaminants, instantly improves your curb appeal, and helps protect your biggest investment from premature aging and decay. It’s a simple step that keeps your home looking fresh and structurally sound.
The Best Time to Pressure Wash
Timing is everything when it comes to pressure washing. The ideal time to schedule a cleaning is during mild weather, typically in the spring or fall. Aim for a day when temperatures are between 40 and 75 degrees Fahrenheit. Washing your house in the scorching summer heat can cause cleaning solutions to evaporate too quickly, leaving behind soapy residue and streaks. On the other hand, washing in freezing temperatures isn’t effective and can lead to ice patches on your walkways. Planning your exterior cleaning for the spring helps wash away winter grime, while a fall cleaning removes summer buildup and prepares your home for the colder months ahead. To get on the schedule before the seasonal rush, it’s always a good idea to get a quote in advance.
Gathering Your Pressure Washing Gear
Before you even pull the start cord, having the right equipment is half the battle. Using the wrong machine, nozzle, or cleaning solution can do more harm than good. Let’s walk through exactly what you’ll need to get your gear in order for a safe and effective house wash.
Picking the Right Pressure Washer
When you’re choosing a pressure washer, the key number to look at is PSI (Pounds per Square Inch). For most home siding, a machine with 1,500 to 2,000 PSI provides plenty of power without being destructive. Anything stronger risks stripping paint or damaging the material itself. For tougher surfaces like driveways or stone patios, you can step it up to a model that delivers 2,000 to 3,000 PSI. The goal is to use just enough pressure for an effective concrete cleaning without causing damage. Starting with a lower PSI is always a smart move; you can increase it if needed.
Must-Have Nozzles and Attachments
Your pressure washer is only as good as the nozzle you attach to it. Nozzles control the angle and intensity of the water stream. For general house washing, a 25-degree (green) nozzle is a great all-rounder. When you’re working on more delicate areas like windows or older wood, switch to a 40-degree (white) nozzle for a wider, gentler spray. This wider fan spreads the pressure out, significantly reducing the risk of etching or splintering surfaces. Always start with the widest angle nozzle you think you’ll need and work your way down if necessary. It’s a simple step that can save you from costly repairs.
Choosing Your Cleaning Solution
Water alone often isn’t enough to cut through stubborn grime, mold, and algae. You can find specialized soaps designed for pressure washers at most hardware stores. In a pinch, even standard dish soap can work. The most important thing is to choose a cleaning solution that is safe for your home’s surfaces and surrounding plant life. For a truly effective and environmentally friendly clean, consider using professional-grade, eco-friendly products. These are formulated to tackle tough stains without harming your property or the planet. Always read the label and follow the dilution instructions carefully.
Essential Safety Equipment
Pressure washing can kick up debris and is surprisingly loud, so safety gear is non-negotiable. At a minimum, you need safety goggles to protect your eyes, gloves for a secure grip, and hearing protection. It’s also critical to maintain a stable footing. Never stand on a ladder while operating a pressure washer; the kickback can easily throw you off balance. For reaching high places on multi-story homes, use an extension wand. If you’re not comfortable with heights or don’t have the right equipment, it’s always safest to get a quote from a professional team.
Prepping Your Home for a Wash
A great wash starts long before you pull the trigger on the pressure washer. Taking the time to properly prepare your home and yard is the single most important step to prevent accidental damage. Think of it as setting the stage for a successful cleaning. A little effort upfront ensures your siding, plants, and windows stay safe, giving you a clean finish without any costly surprises. These simple prep steps will help you protect your property and get the best possible results.
Clear the Area
Before you start, walk around your home and move anything that could get in the way or be damaged by the spray. This includes patio furniture, grills, potted plants, garden hoses, and kids’ toys. Find a safe spot for them away from the washing zone. It’s also smart to cover any exterior electrical outlets, light fixtures, and vents with plastic sheeting and painter’s tape. This simple step is a crucial part of electrical safety and prevents water from getting into sensitive components, which could lead to shorts or damage.
Protect Your Plants
Your home’s landscaping is just as important as its siding. To protect your flowerbeds, shrubs, and other plants from cleaning solutions, give them a good rinse with a garden hose before you begin. Saturating the soil and leaves with water helps dilute any chemical runoff that might splash onto them. For extra protection on more delicate or prized plants, you can loosely cover them with lightweight plastic tarps. Just remember to rinse everything again with fresh water once you’ve finished washing that section of your house.
Seal Up Cracks and Openings
Water has a knack for finding its way into the smallest spaces. Before you start spraying, make sure all your windows and doors are shut tightly. Lock them to ensure the tightest possible seal. Take a moment to inspect the weather stripping and caulking around frames and sills. If you see any significant gaps or cracks, you might want to hold off on washing until you can make repairs. This prevents water and cleaning agents from seeping inside, which could lead to water damage, mold growth, or other interior issues.
Do a Quick Spot Test
Never start pressure washing in a highly visible area. Always begin with a small, hidden spot to test your technique and pressure setting. A good place is a section of siding that’s usually covered by a bush or located on the back of the house. Start with the widest nozzle and the lowest pressure setting, holding the wand about three feet from the surface. This allows you to see how the material reacts before you commit to cleaning the entire wall. It’s the best way to avoid accidentally stripping paint or etching the surface.
Mastering Your Pressure Washing Technique
Once you have your gear and your home is prepped, it’s time to start washing. But pressure washing isn’t a one-size-fits-all job. Different surfaces require different approaches to get them sparkling clean without causing any harm. Getting the technique right is the key to achieving that fresh, like-new look for your home’s exterior.
How to Wash Siding
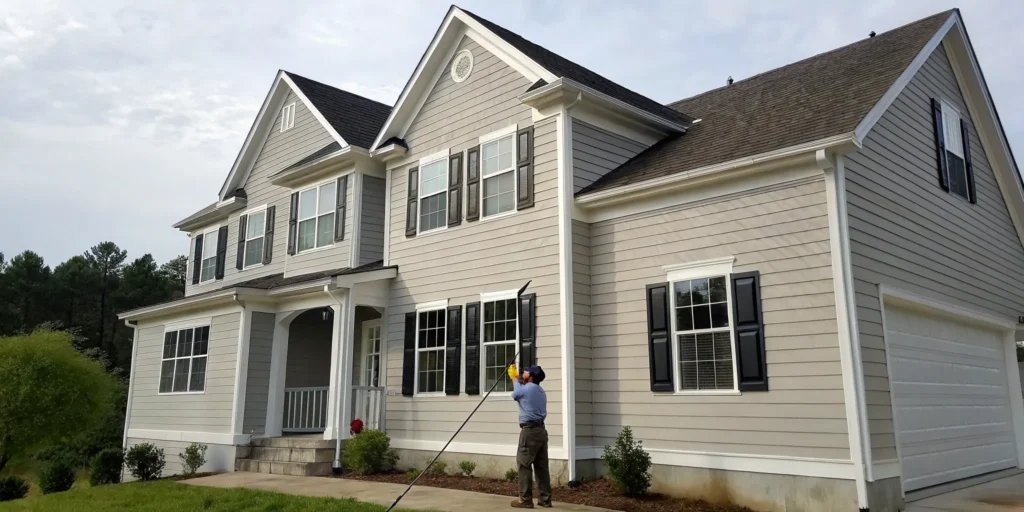
Your home’s siding is delicate, so a gentle touch is crucial. For most vinyl or wood siding, a pressure washer set between 1,500 and 2,000 PSI is plenty. If your machine is more powerful, just stand further back to reduce the force. Before you apply any cleaning solution, give your house and the surrounding plants a good rinse with plain water. This simple step helps protect your landscaping from any chemicals in your cleaner. When you’re ready to wash, keep the nozzle moving in smooth, overlapping strokes to avoid leaving lines or marks on the siding. This careful approach is central to a professional house washing job.
Cleaning Decks and Patios
When cleaning multi-level areas like a deck, it’s best to start high and work your way down. Begin with railings, posts, and stairs before moving on to the main deck floor. This ensures you aren’t dripping dirty water onto surfaces you’ve already cleaned. For large, flat areas like a deck or patio, a surface cleaner attachment can be a real game-changer. It helps you clean much faster and prevents the streaky lines that can happen when using just a nozzle. This tool gives you a more even and professional finish, which is essential for proper deck and cedar restoration.
Tackling Driveways and Concrete
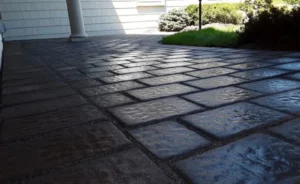
Concrete surfaces like driveways and walkways can handle more power than your siding. You can typically use a higher pressure setting, somewhere in the 2,000 to 3,000 PSI range, to blast away tough oil stains and ground-in dirt. Even though concrete is durable, you still want to be careful not to use so much pressure that you etch or damage the surface. Start with a lower pressure and increase it as needed. Using a steady, sweeping motion will give you the best results and leave you with a uniformly clean driveway. For stubborn grime, a specialized concrete cleaning solution can make a big difference.
Why You Should Work from Top to Bottom
Here’s a pro tip that might sound a little backward at first: apply your cleaning solution from the bottom up, but rinse from the top down. Applying the cleaner from the bottom prevents streaks from forming as the solution runs down the dirty surface. Once the cleaner has had a few minutes to work its magic, start rinsing with clean water from the top of the house. Let gravity help you wash all the soap and grime down and away. As you rinse, hold the nozzle at a 45-degree angle to the siding. This prevents water from being forced up and under the panels, which could lead to moisture problems later on.
Matching the Pressure to the Surface
Think of pressure washing like cooking: you wouldn’t use the highest heat setting for every dish. The same principle applies to your home’s exterior. Using the wrong water pressure can do more harm than good, turning a simple cleaning project into a costly repair job. Different materials require different levels of force, and knowing how to adjust your pressure washer is the key to a successful, damage-free wash.
The secret is to match the pressure, measured in pounds per square inch (PSI), to the surface you’re cleaning. Delicate materials like vinyl siding and painted wood need a gentle touch, while tough surfaces like concrete can handle more power. This is the core idea behind soft washing, a technique that relies on specialized cleaning solutions and low pressure to safely remove dirt, grime, and algae. It’s a smarter, safer way to clean that protects your investment. Before you pull the trigger, take a moment to identify the material you’re working with. Is it porous brick? Painted wood? Sturdy concrete? This simple step will help you choose the right setting and protect your home from accidental damage, ensuring a clean finish without any regrets. It’s all about working smarter, not harder, and letting the right combination of pressure and cleaning solution do the work for you.
Using Low Pressure for Delicate Surfaces
When you’re dealing with more fragile parts of your home, less is definitely more. Surfaces like vinyl siding, painted trim, and soft woods like cedar require a gentle approach. High pressure can easily chip paint, splinter wood, or force water behind siding, which can lead to mold and rot. That’s why experts recommend using low pressure and maintaining a safe distance, as too much force can quickly damage these materials. A low-pressure setting allows your cleaning solution to do the heavy lifting, breaking down dirt and grime so you can rinse it away without blasting the surface itself. This is the safest way to handle your home’s most vulnerable areas.
Applying Medium Pressure for Siding
For many common siding materials, a medium pressure setting strikes the right balance. According to home improvement experts, a range of 1,000 to 1,500 PSI is ideal for materials like aluminum siding, traditional stucco, and some harder woods. At this level, you have enough force to rinse away loosened grime without running the risk of causing damage. The key is to let the water volume, not the intense pressure, do the rinsing. Always keep the nozzle moving in a steady, sweeping motion and maintain a safe distance from the surface. This technique ensures a thorough clean for your house washing project while keeping your siding intact.
When to Use High Pressure
High pressure should be reserved for the toughest, most durable surfaces around your property. Think unpainted concrete driveways, stone patios, and brick walkways. These materials can withstand a more powerful stream of water to remove deep-set stains, oil spots, and stubborn grime. For these jobs, a PSI of 2,000 to 3,000 might be necessary. However, even concrete has its limits. You want to use enough pressure to clean effectively without damaging the surface itself. Always start with a lower setting and a wider nozzle, gradually increasing the pressure only if needed. This approach helps you avoid etching or chipping your hardscapes during a concrete cleaning.
How to Use a Pressure Washer Safely
Using a pressure washer can be incredibly satisfying, but that power comes with responsibility. A high-pressure stream of water can cause serious injury or damage your home in the blink of an eye. Before you even pull the trigger, it’s essential to make safety your top priority. Think of it as part of the job, just like choosing the right nozzle. A single slip can send a stream of water under your siding, forcing moisture into your walls, or it could etch lines into your deck that are impossible to remove. By taking a few simple precautions, you can protect yourself, your family, and your property from any mishaps. These steps aren’t just suggestions; they’re the key to a successful and stress-free cleaning day that leaves your home looking refreshed, not repaired.
Gear Up for Safety
First things first, let’s talk about your outfit. And no, I don’t mean your favorite gardening clothes. You need proper personal protective equipment (PPE). Start with safety goggles to shield your eyes from flying debris and chemical splashes. Next, grab a pair of sturdy gloves for a better grip and to protect your hands. Because these machines are loud, a good pair of earplugs or earmuffs is a must for hearing protection. Finally, wear closed-toe shoes, preferably waterproof boots, to protect your feet. Before you start spraying, do a final check around the house: make sure all windows and doors are shut tight to keep water from getting inside.
Master Your Stance and Spray
How you hold and operate the pressure washer wand makes all the difference. Always use two hands to control the wand and maintain a firm, stable stance to brace for the kickback when you pull the trigger. Keep the nozzle at least three feet away from the surface you’re cleaning and never point it at people, pets, or plants. If you’re new to this, a great way to get comfortable is to test your technique on a hidden spot, like a section of siding behind a bush. Start with the lowest pressure setting and a wide-angle nozzle, gradually increasing it only if necessary. This helps you get a feel for the machine without risking damage.
Mind the Weather and Electrical Risks
Believe it or not, the weather plays a big role in your pressure washing project. The ideal time to wash your house is on a calm, overcast day in the spring or fall when temperatures are mild. If it’s too hot and sunny, the cleaning solution can dry on the surface before you have a chance to rinse it, leaving behind ugly streaks. The most critical safety rule, however, involves electricity. Water and electricity are a dangerous combination, so always keep the nozzle and water spray at least 10 feet away from any power lines. Be mindful of outdoor electrical outlets and light fixtures, and cover them with plastic and tape before you begin.
Dealing with Tough Stains, Mold, and Mildew
Sometimes, pressure alone won’t cut through years of built-up grime, especially stubborn green and black stains. For mold, mildew, and algae, you’ll need to bring in the right cleaning solutions and techniques to get your home looking its best.
Pre-Treating Stubborn Spots
Before you even think about applying a cleaner, give your house and the surrounding landscape a good rinse with plain water. Pay special attention to any plants, shrubs, or flowerbeds near the foundation. Soaking the soil and foliage helps protect your plants from any runoff from the cleaning solutions you’ll be using. Think of it as giving them a protective drink of water first. This simple step can make a huge difference in keeping your garden healthy. Pre-rinsing the siding also helps to loosen surface-level dirt, making your cleaning solution more effective on the tough stuff underneath.
Using the Right Cleaner for Mold and Algae
For organic growth like mold and algae, you’ll need more than just water. You can find detergents specifically made for siding at most hardware stores. Alternatively, a diluted bleach solution can be very effective. For areas with heavy growth, you can try a mix of one part bleach to four parts water. When we handle a professional house washing, we use specialized, eco-friendly cleaners that are formulated to kill mold and mildew without harming your home’s surfaces or the environment. Choosing the right cleaner is key to getting rid of stains for good.
Rinsing for a Spotless Finish
Once your cleaning solution has had a few minutes to work its magic, it’s time to rinse everything away. Always work from the top down to avoid streaking. Keep your pressure washer nozzle at a 45-degree angle to the siding. This prevents you from forcing water up and under the panels, which could lead to moisture damage and mold problems down the road. Be thorough with your rinse. Leaving any chemical residue behind can harm your siding over time. A complete and careful rinse is what gives your home that perfectly clean, spot-free look. If you’re unsure about the process, you can always get a quote from a professional.
Common Pressure Washing Mistakes to Avoid
Pressure washing can deliver a satisfying, instant transformation for your home’s exterior. But that power comes with responsibility. A few common missteps can turn a weekend project into a costly repair, leading to damaged siding, stripped paint, or a streaky, uneven finish. Knowing what not to do is just as important as learning the right technique. From using the wrong nozzle to washing on a blazing hot day, these errors are easy to make but also easy to avoid once you know what to look for. By sidestepping these frequent mistakes, you can protect your property and achieve that fresh, clean look you’re after. If you ever feel unsure, remember that professional exterior cleaning services are always an option to handle the job safely and effectively.
Using Too Much Pressure
One of the most frequent and damaging mistakes is thinking that more pressure equals a better clean. That’s simply not true. Using excessive force can etch concrete, splinter wood decks, and even crack or dent your home’s siding, especially if it’s vinyl or aluminum. Different surfaces require different water pressure levels. For instance, soft woods and painted surfaces need a gentle touch, while harder materials like brick or stone can handle a bit more force. Always start with a lower pressure setting and a wider nozzle, testing on an inconspicuous area first. This approach prioritizes your home’s safety over sheer power, which is the core principle behind professional soft washing.
Choosing the Wrong Cleaning Solution
The water itself does a lot of the work, but the right cleaning solution is what truly lifts away dirt, mold, and grime. However, not all cleaners are created equal. Using a harsh chemical that isn’t designed for your specific siding material can cause discoloration, streaks, or long-term damage. It’s crucial to select a product formulated for pressure washing and for the surface you’re cleaning. We recommend using effective, eco-friendly products that are tough on dirt but gentle on your home and the environment. Before you begin, always test your chosen solution on a small, hidden spot to ensure it doesn’t cause any adverse reactions.
Washing in the Wrong Weather
Believe it or not, the weather plays a huge role in the final result of your pressure washing project. Washing your house on a hot, sunny day is a common mistake. The direct sunlight and heat can cause your cleaning solution to evaporate too quickly, before it has a chance to work properly. This often leaves behind soapy residue and unsightly streaks that are difficult to remove. For the best results, choose an overcast day with mild temperatures. Experts suggest the best time to pressure wash is when it’s calm and the temperature is between 40 and 75 degrees Fahrenheit, allowing the cleaner to do its job for a spotless finish.
Know When to Call a Professional
While tackling a home project yourself can be incredibly satisfying, some jobs come with risks that just aren’t worth it. Pressure washing, in particular, can be tricky. Knowing when to step back and call in a professional isn’t admitting defeat; it’s making a smart decision to protect your biggest investment and yourself. If you’re feeling unsure or your home has some unique challenges, it might be time to let an expert handle the job.
Signs It’s Time to Hire an Expert
Let’s be real: pressure washers are powerful tools. In the wrong hands, they can easily gouge wood, chip paint, or even break windows. If you’re looking at a two-story home, a steep roof, or have delicate garden beds right up against the house, the risk of an accident or damage goes way up. These tricky spots are where professionals shine. They have the right equipment and experience to work safely and efficiently. If the job feels too big or too risky, that’s your cue to get a quote from a team that does this every day.
The Benefits of Professional Soft Washing
Not all exterior surfaces are created equal, and that’s where soft washing comes in. Unlike high-pressure washing, this method uses specialized, low-pressure nozzles combined with effective, biodegradable cleaning solutions. It’s the perfect approach for more delicate materials like vinyl siding, cedar shingles, and painted wood, as it cleans away grime, mold, and algae without the risk of damage. A professional team understands the science behind the clean, using the right eco-friendly products that won’t harm your siding or your landscaping. This expertise ensures a beautiful, lasting clean that protects your home’s value.
A SUPERIOR CLEAN
Ready to Refresh
Your Property?
Gulf2Bay Softwash provides safe, eco-friendly exterior cleaning services that remove dirt, mold, mildew, and algae while protecting your home or business.
Frequently Asked Questions
What is the real difference between pressure washing and soft washing? Think of it this way: pressure washing uses high-force water to blast away dirt, which is great for tough surfaces like concrete. Soft washing, on the other hand, is a more advanced technique that uses specialized cleaning solutions to kill mold, algae, and mildew. After the cleaners do their work, we rinse everything away with low-pressure water, similar to a garden hose. For most parts of your home, like siding and roofing, soft washing is the safer and more effective method.
How often should I have my house washed? For most homes in our area, a professional exterior cleaning every one to two years is a good rule of thumb. However, this can change based on your specific environment. If your home is under a lot of trees or in a shady, damp spot, you might notice green algae or grime building up more quickly and may need a wash more often. Regular cleaning is a key part of home maintenance that prevents long-term staining and damage.
Can I really damage my home by pressure washing it myself? Yes, absolutely. It’s one of the most common DIY pitfalls. Using too much pressure can easily chip paint, splinter a wood deck, or force water behind your siding, which can lead to mold and rot inside your walls. Each surface requires a specific pressure setting and technique, and getting it wrong can lead to expensive repairs.
Are the cleaning solutions you use safe for my family, pets, and garden? Your family’s safety is our top priority. We use professional-grade, eco-friendly cleaning solutions that are biodegradable and effective. When applied correctly by our trained technicians, they are safe for your home, landscaping, and the people and pets who enjoy it. We also take extra precautions, like pre-rinsing plants and vegetation, to ensure everything is protected.
Is it better to wash my house in the spring or the fall? Both seasons are excellent times for an exterior cleaning, and the best choice really depends on your goal. A spring wash is perfect for clearing away all the winter dirt, salt, and pollen, giving your home a fresh start for the warmer months. A fall cleaning removes summer buildup from dust and storms, preparing your home’s exterior to handle the harsh winter weather ahead.