Nothing is more frustrating than finishing a big project only to see a cloudy, white film ruin the final look. For paver patios, this disaster often happens during the very last step. You might think that once the polymeric sand is in, you can just roll on a sealer and call it a day. Unfortunately, a simple mistake in timing or application can trap moisture, leading to a hazy finish that’s a nightmare to fix. Getting a professional, crystal-clear result when sealing pavers after polymeric sand requires patience and know-how. We’ll show you how to avoid the common pitfalls and achieve a flawless finish that protects and beautifies your hardscape.
A SUPERIOR CLEAN
Ready to Refresh
Your Property?
Gulf2Bay Softwash provides safe, eco-friendly exterior cleaning services that remove dirt, mold, mildew, and algae while protecting your home or business.
Key Takeaways
- Patience is your most important tool: Before sealing, wait at least 30 days for the polymeric sand to cure and ensure the pavers are completely dry. This single step is the best way to prevent a cloudy, hazy finish from trapping moisture.
- Apply thin coats of a water-based sealer: The right product and technique are key. A breathable, water-based sealer prevents peeling, and applying two thin coats (not one thick one) gives you a durable, even finish without sticky, shiny spots.
- Reseal every 3 to 5 years to maintain protection: Sealer is not permanent, so plan to reapply it every few years to keep your pavers looking vibrant and protected. If the surface soaks up water instead of beading it, it’s time for a fresh coat.
What Is Polymeric Sand?
If you have a paver patio, walkway, or driveway, you’ve probably noticed the material filling the gaps between the stones. For a professional, long-lasting installation, that material is almost always polymeric sand. In simple terms, it’s a special blend of fine sand mixed with polymer binders. When activated with water, these binders harden to create a firm, durable joint that locks your pavers in place. It’s the secret ingredient to a beautiful and stable hardscape that stands the test of time.
Using the right materials is key to protecting your investment. Whether you’re installing a new patio or restoring an old one, understanding the role of polymeric sand is the first step. It’s a far superior choice compared to regular sand, offering benefits that keep your outdoor spaces looking clean and well-maintained for years. At Gulf2Bay, our paver cleaning and sealing services are designed to work with these modern materials to ensure the best possible protection and appearance for your property.
Polymeric Sand vs. Regular Sand
The biggest difference between polymeric sand and regular sand comes down to one word: binding. Regular sand, like the kind you might find at a hardware store, is just loose aggregate. It can easily wash out during a heavy rainstorm, get displaced by foot traffic, or become a home for weeds and ants. You’ll find yourself sweeping it back into place constantly.
Polymeric sand, on the other hand, hardens to form a solid, flexible joint. This creates a powerful barrier that prevents erosion and stops weeds from sprouting through the cracks. Because it becomes water-resistant once cured, it stays put and provides continuous stability for your pavers, something regular sand simply can’t do.
The Main Benefits of Using Polymeric Sand
Choosing polymeric sand for your paver joints comes with a handful of fantastic benefits. First and foremost, it provides incredible stability, locking pavers together to prevent them from shifting or wobbling over time. This is a huge plus for high-traffic areas like driveways and walkways. It also acts as a powerful deterrent against nature’s little annoyances. The hardened surface makes it extremely difficult for weeds to take root and for ants to build nests between your stones.
Beyond its functional advantages, polymeric sand helps protect your hardscape from natural wear and tear and gives the joints a cleaner, more finished look. It’s quick for professionals to apply and ensures your patio or walkway looks pristine from day one.
Do You Actually Need to Seal Polymeric Sand?
This is a question we get all the time. Since most polymeric sand is already water-resistant, sealing the sand itself isn’t strictly necessary for its performance. However, the real reason to seal is to protect the pavers. A high-quality sealer, like the Trident products we use, shields your pavers from stains, UV rays, and moisture damage, which can cause fading and deterioration.
Sealing also adds a secondary layer of protection to the sand, locking it in and further preventing any chance of erosion or weed growth. If you decide to seal, it is critical that the pavers and the sand are completely dry. Sealing too early can trap moisture, leading to a cloudy finish or other issues. Traditionally, experts recommended waiting 90 days, but with modern products, 30 days is often enough time for everything to cure properly.
When to Seal Pavers After Applying Polymeric Sand
Timing is everything, especially when it comes to sealing your pavers. After you’ve gone through the work of applying polymeric sand, you’re probably eager to get that final protective coat of sealer on. But jumping the gun can do more harm than good. Sealing is the final step to protect your investment and keep your patio or walkway looking its best, so it’s worth taking the time to get it right. The key is to wait for the polymeric sand to fully cure and for the pavers themselves to be completely dry. This patience ensures the sealer adheres properly and doesn’t trap anything that could ruin the finish. Think of it as letting a freshly baked cake cool completely before you add the frosting; it’s a crucial step for a flawless result.
Signs Your Polymeric Sand Has Fully Cured
So, how do you know when the time is right? First, the polymeric sand needs to be completely cured. While the sand will harden and become resistant to water within about 24 to 48 hours, a full cure takes longer. We recommend waiting at least 30 days after installation. This waiting period allows all the moisture from the installation process to evaporate from the base and the pavers themselves. It also gives time for any potential efflorescence (a harmless, chalky white residue) to appear and be cleaned off before you seal it in. A sure sign of a full cure is when the sand is uniformly hard and solid throughout every joint, with no soft or damp spots.
The Risks of Sealing Too Soon
Being impatient and sealing your pavers too early can lead to some frustrating problems. The biggest risk is trapping moisture within the pavers and the sand joints. When you apply a sealer over a surface that isn’t completely dry, that hidden moisture gets locked in. This can cause the sealer to fail, creating a cloudy, white, or hazy appearance that is very difficult to remove without completely stripping the surface. Furthermore, trapped moisture can weaken the polymeric sand, causing the joints to soften and fail over time. This defeats the whole purpose of using it in the first place. Waiting ensures you get a crystal-clear finish and strong, stable joints that last for years.
How to Prep Your Pavers for Sealing
Think of sealing your pavers like painting a room in your house. The final result is only as good as your prep work. Rushing this stage is the fastest way to get a finish you’re not happy with. Taking the time to properly prepare your paver surface is the secret to a durable, beautiful seal that lasts for years. It ensures the sealer bonds correctly and prevents issues like trapped dirt or a cloudy finish. Let’s walk through the essential steps to get your pavers ready.
Clean the Paver Surface
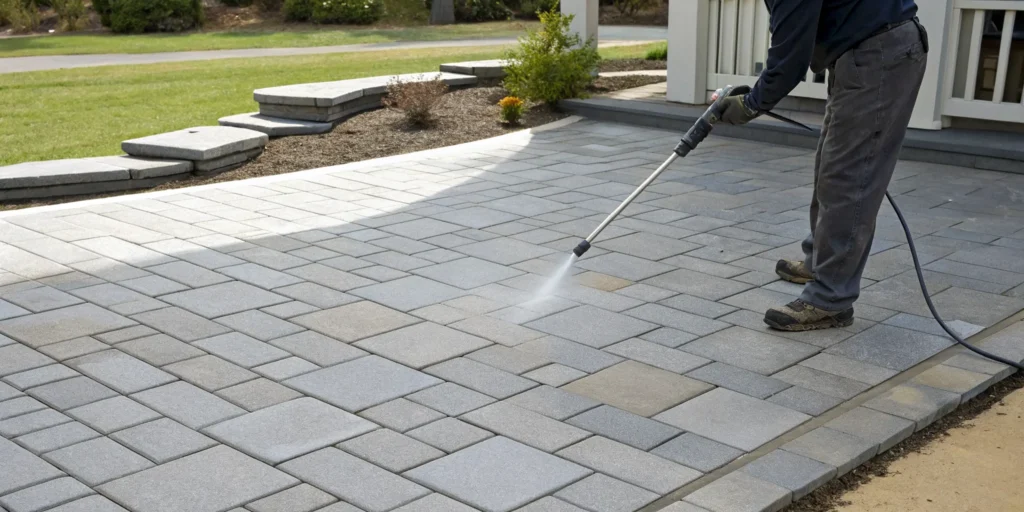
First things first, your pavers need to be completely clean. We’re not just talking about a quick sweep. You need to remove all dirt, moss, algae, and grime from both the paver surfaces and the joints. Any debris left behind will get trapped under the sealer, creating a messy look and preventing a strong bond. For the best results, a thorough cleaning is essential. Using the right eco-friendly products ensures the surface is pristine without harming your surrounding landscape. This step is non-negotiable for a professional-looking finish.
Remove Stains and Efflorescence
Once the general grime is gone, it’s time to spot-treat any stubborn areas. Look for oil spots, rust marks, or that chalky white film known as efflorescence. Efflorescence is simply salt and minerals rising from within the pavers, and sealing over it will trap the haze permanently. It’s crucial to treat these issues before applying a sealer. Different stains require different solutions, so make sure you’re using the correct cleaner for the job. A deep, professional paver cleaning can tackle these tough stains and efflorescence effectively.
Ensure the Pavers Are Completely Dry
Patience is key here. It is incredibly important that the pavers and the polymeric sand are bone dry before you begin sealing. Applying sealer to a damp surface will trap moisture, which leads to a cloudy, milky appearance that can ruin the whole project. After a deep cleaning or a rainstorm, you should wait at least 24 to 48 hours. Check the weather forecast to make sure you have a clear, dry window ahead. The surface might feel dry to the touch, but the joints and the pores of the pavers need extra time to dry out completely.
Inspect for Gaps and Problem Areas
Before you open that can of sealer, do one last walkthrough. Check the polymeric sand joints between the pavers. Are there any low spots or gaps? If so, top them off and allow the new sand to set according to its instructions. This ensures your pavers remain stable and locked in place. Also, look for any loose or wobbly pavers that might need resetting. Addressing these small problems now prevents bigger headaches later. If you find significant issues, it’s always best to get a professional opinion before sealing.
How to Choose the Right Sealer for Your Pavers
Walking into the sealer aisle at a home improvement store can feel overwhelming. With so many options, how do you pick the right one for your patio or walkway? Choosing the correct sealer is about more than just looks; it’s about protecting your investment and making sure your pavers last for years. The right product will shield your pavers from stains, prevent weed growth, and keep them looking their best.
Making the right choice comes down to three key factors: the sealer’s base, its finish, and how it works with your polymeric sand. Let’s break down what you need to know to select a sealer with confidence, ensuring you get a beautiful, long-lasting result.
Water-Based vs. Solvent-Based Sealers
The first major decision is choosing between a water-based and a solvent-based sealer. While solvent-based options are available, we almost always recommend a high-quality water-based sealer. The main reason is breathability. Water-based sealers form a protective barrier that still allows any moisture trapped underneath the paver to escape. This is crucial for preventing the sealer from turning cloudy, peeling, or flaking off over time, especially with New York’s fluctuating weather.
Solvent-based sealers create a less permeable film, which can trap moisture and lead to issues down the road. For a durable, reliable finish that works with your pavers, not against them, a water-based formula is the way to go. We prioritize using effective and eco-friendly products that offer superior protection without the harsh chemicals, making water-based sealers a perfect fit.
Selecting Your Finish: Gloss, Matte, or Wet-Look
Next, think about the final look you want to achieve. This part is all about your personal style. Do you prefer a natural, understated appearance, or do you want your pavers to really pop? A matte finish sealer provides protection without adding any shine, preserving the original look of your stone. A gloss sealer, on the other hand, adds a noticeable sheen for a more polished and striking effect.
If your pavers have lost some of their original vibrancy, a “wet-look” or color-enhancing sealer is a fantastic option. This type of finish deepens the colors of the pavers, making them look rich and saturated, similar to how they appear right after it rains. It’s a great way to revitalize a faded patio and bring it back to life.
Checking for Compatibility with Polymeric Sand
Finally, you need to make sure your sealer is compatible with your polymeric sand. Here’s the good news: most modern polymeric sands are designed to be waterproof on their own, so sealing them is often not a required step. The polymers in the sand create a firm, water-resistant joint that effectively blocks weeds and resists erosion. Sealing over it typically won’t cause any harm, but it may be an unnecessary expense and effort.
Before you buy, always read the manufacturer’s instructions for both the polymeric sand and the sealer. If you used a specific type of permeable sand that allows water to pass through, sealing would be more important. When in doubt, a quick check of the product specs can save you a headache. If you’re unsure about the right products for your project, our professional paver cleaning and sealing services can handle the entire process for you.
Your Step-by-Step Guide to Sealing Pavers
With your pavers clean and the polymeric sand fully cured, you’re ready for the final and most rewarding step: applying the sealer. This process is what locks in all your hard work, creating a protective barrier that shields your patio or driveway from the elements. A good seal helps prevent stains from oil and spills, inhibits weed growth between the joints, and protects the pavers from fading due to harsh UV rays. It not only extends the life of your hardscape but also enhances its color, bringing out the rich tones of the stones and giving it a polished, finished look.
While sealing pavers is a project you can certainly tackle yourself, the key is to be patient and methodical. Rushing through these steps or missing a small detail can lead to a finish you’re not happy with, like a cloudy surface or uneven sheen. Following this guide will help you achieve a durable, professional-looking seal. Remember to work in a well-ventilated area and wear appropriate safety gear, like gloves and eye protection. If you want to guarantee a flawless finish without the guesswork, our team offers expert paver cleaning and sealing services. We handle every detail so you can just enjoy the beautiful results.
Step 1: Perform a Final Surface Check
Before you even open the sealer, do one last inspection of your paver surface. It is absolutely critical that the pavers and the polymeric sand are completely dry. Sealing too early will trap moisture underneath the sealer, which can create a cloudy or hazy white film that is very difficult to remove. Give the surface a final sweep with a leaf blower or broom to clear away any leaves, dirt, or debris that may have settled. It’s also a smart idea to check the weather forecast. You’ll need a few consecutive dry days with moderate temperatures for the sealer to apply and cure properly.
Step 2: Apply the First Coat of Sealer
Now it’s time to apply your first coat. Using a garden pump sprayer is often the easiest way to get a thin, even layer. Start in one corner and work your way across in small, manageable sections, like a 4-foot by 4-foot area. Spray just enough sealer to saturate the surface without letting it puddle. The goal is a consistent, wet look across the pavers. For a top-tier, long-lasting finish, we recommend using professional-grade Trident products, which are designed to provide superior protection and enhancement for your hardscapes.
Step 3: Let the First Coat Dry Completely
Patience is your best friend during this step. Once the first coat is applied, you need to let it dry thoroughly. While it might feel dry to the touch in a few hours, it’s best to wait at least 24 hours before walking on it or applying a second coat. This allows the sealer to properly adhere to the paver surface and begin its curing process. To be safe, rope off the area to prevent any accidental footprints from family, visitors, or pets. This waiting period is essential for building a strong, protective foundation for the final coat.
Step 4: Apply the Second Coat and Remove Any Excess
A second coat of sealer provides an extra layer of protection and helps even out the sheen for a uniform appearance. Apply the second coat the same way you did the first, working in small sections. Immediately after spraying each section, use a foam roller to back-roll the area. This technique is key for a perfect finish. It smooths out the sealer, removes any excess that might have pooled in the joints, and prevents a milky buildup. This simple action makes a huge difference in achieving that smooth, professional look you’re after.
Step 5: Allow the Sealer to Fully Cure
You’re on the home stretch, but don’t get ahead of yourself. The sealer needs time to fully cure, which is the chemical process where it hardens and reaches maximum durability. Allow the surface to cure for at least 48 to 72 hours before you allow regular foot traffic or move furniture back onto it. For driveways, wait at least 72 hours before parking any vehicles on the pavers. Rushing this final step can compromise the seal and undo all your hard work. If you have any questions or feel the job is bigger than you expected, don’t hesitate to get a quote from our team.
Common Paver Sealing Mistakes to Avoid
You’ve done the hard work of installing your pavers and applying the polymeric sand. Now, the final step is sealing, and it’s tempting to rush through it. But this is where a little patience and know-how can make all the difference between a beautiful, long-lasting patio and a cloudy, peeling mess. Getting a professional result means avoiding a few common mistakes that can trap moisture, create an uneven finish, or cause the sealer to fail prematurely. Let’s walk through what not to do, so your hard work truly shines.
Sealing Before the Sand Is Cured
I get it, you’re excited to finish the project and start enjoying your new patio. But sealing too soon is one of the biggest mistakes you can make. Polymeric sand needs time to fully cure, and your pavers need time to release any efflorescence, which is that chalky white residue that can appear on new concrete. While some guides suggest waiting 30 days, it’s much safer to wait 60 to 90 days. Sealing before everything has cured traps moisture and minerals under the sealer, leading to a hazy or cloudy finish that’s a real headache to fix. Patience is your best friend here; give your pavers and sand the time they need to settle in properly.
Applying Too Much Sealer
When it comes to paver sealer, more is definitely not better. Drenching your pavers with a thick coat of sealer won’t give you extra protection. Instead, it often leads to a milky, blotchy surface that looks uneven and unprofessional. Excess sealer can pool in the joints and on the textured surfaces of your pavers, creating shiny spots and a sticky finish that attracts dirt. The key is to apply two thin, even coats. Use a roller or a sprayer for light application, and always back-roll to remove any puddles. This ensures the sealer absorbs properly and provides a durable, uniform finish without the milky buildup.
Skipping the Cleaning and Drying Steps
Sealing your pavers is like painting a wall: you would never paint over dirt and dust. Any stains, dirt, or debris left on the surface will be permanently trapped under the sealer, becoming a permanent feature of your patio. Before you even think about opening that can of sealer, you must give your pavers a thorough cleaning. Equally important is ensuring they are completely dry. Sealing damp pavers traps moisture, which can prevent the sealer from bonding correctly and cause it to peel or turn cloudy. After cleaning, wait at least 24 to 48 hours in dry, sunny weather before you begin paver sealing.
Using the Wrong Type of Sealer
Not all sealers are created equal, and choosing the wrong one can ruin your project. For most residential applications, a water-based sealer is the way to go. Unlike solvent-based options, water-based sealers are breathable, meaning they allow any trapped moisture to escape. This simple feature is what prevents the sealer from peeling, flaking, or developing a cloudy haze over time. Many modern sealers, like our eco-friendly Trident products, offer excellent protection without the harsh chemicals. Always check that the sealer is compatible with polymeric sand and choose a finish (like matte or wet-look) that complements your home’s style.
How Often Should You Reseal Your Pavers?
Once you’ve sealed your pavers, you’re not done forever. Think of sealer as a protective shield that wears down over time, and just like any shield, it needs maintenance to stay effective. As a general rule, you should plan to reseal your pavers every three to five years. This regular upkeep is the key to protecting your investment from the elements, preventing stains from things like oil or fallen leaves, and keeping your patio or driveway looking its best. Sticking to a consistent schedule ensures your pavers remain vibrant and structurally sound for years to come, preventing bigger issues down the road.
Of course, this three-to-five-year window is just a guideline. The actual frequency depends on several factors, including your local climate and how much you use the space. A heavily used driveway in an area with harsh winters will likely need attention sooner than a quiet, shaded patio. The goal is to reapply the sealer before the previous coat has completely worn away, so you’re always maintaining a strong layer of protection against moisture and UV damage. Our professional paver cleaning and sealing services can help you establish the right schedule for your specific property, taking all these variables into account.
Factors That Affect Your Resealing Schedule
The lifespan of your paver sealer isn’t set in stone. Several key factors influence how often you’ll need to reapply it. The most significant is weather. Here in New York, our pavers endure a lot, from heavy rain and snow to intense summer sun, all of which can break down the sealer more quickly. The amount of foot or vehicle traffic also plays a huge role; a driveway will show wear much faster than a decorative garden path.
According to paver experts at Nicolock, sealing not only enhances color but also extends the life of your pavers by preventing fading and staining. It’s also important to remember that while sealer protects the surface, it doesn’t make the joints between pavers completely waterproof. Water can still get in from the sides and underneath, so proper drainage and a solid base remain crucial for long-term stability.
Telltale Signs It’s Time to Reseal
Not sure if your pavers are ready for a fresh coat? Your eyes are your best tool. The most obvious sign is that the colors look dull, faded, or washed out. If your once-vibrant pavers now seem lackluster, it’s a clear signal that the sealer has worn off. You can also perform a simple water test: splash a little water on the surface. If it beads up, the sealer is still working. If it soaks in and darkens the paver, it’s time to reseal.
Another sign is difficulty with cleaning. If you notice that dirt, moss, or stains are becoming harder to wash away, it means the protective barrier is gone. Applying a fresh coat, especially a color-enhancing one, can rejuvenate their appearance and make them look bright again. If you’re seeing these signs, it’s best to act sooner rather than later. You can always get a professional quote to have your pavers inspected and restored.
When to Call a Professional Paver Sealing Service
Even with the best step-by-step guide, some projects are more complex than they first appear. Sealing pavers is one of those jobs where a small mistake can lead to a big headache. While you can certainly tackle this yourself, there are a few situations where calling in a professional is the smartest move to protect your investment and ensure a beautiful, long-lasting finish.
Think about the timing. As we’ve covered, sealing pavers before the polymeric sand and the pavers themselves are completely dry is a recipe for disaster. It can trap moisture, leading to a cloudy, white haze that’s tough to fix. A professional has the experience to know exactly when conditions are perfect for sealing. They can assess moisture levels and understand the specific curing requirements for your pavers, taking the guesswork completely out of the equation. It’s their job to get it right the first time.
Professionals also have access to commercial-grade equipment and products that deliver a more durable, even finish. At Gulf2Bay, for example, we use high-quality, eco-friendly sealers designed for superior protection and appearance. Plus, let’s be honest, the prep work of deep cleaning and stain removal is a job in itself. A professional service handles everything from start to finish, saving you a weekend of hard labor and giving you peace of mind that the job is done correctly. If you’re looking at your patio and feeling a little overwhelmed, it might be the perfect time to get a quote and let an expert take care of it for you.
Related Articles
- Professional Paver Sealing: Winter-Proof Your Outdoor Spaces This Christmas 2025
- #1 Paver Sealing in Long Island NY: Extend the Life of Your Hardscape
- Premium Joint Stabilizing Sealers for Paver Care | Gulf2Bay
- #1 Expert Professional Paver Cleaning and Sealing Services
- #1 Paver Cleaning and Sealing Services: Get the Most From Your Outdoor Space
A SUPERIOR CLEAN
Ready to Refresh
Your Property?
Gulf2Bay Softwash provides safe, eco-friendly exterior cleaning services that remove dirt, mold, mildew, and algae while protecting your home or business.
Frequently Asked Questions
I sealed my pavers and now they look cloudy. What happened and can I fix it? This is a common and frustrating problem, and it almost always means moisture was trapped under the sealer. This can happen if the pavers were not completely dry before you started or if the sealer was applied in very humid conditions. Unfortunately, fixing it usually involves using a chemical stripper to remove the sealer completely and starting the process over. This is why being patient and waiting for a long stretch of dry weather is the most important part of the job.
Do I really need to seal my pavers? What happens if I don’t? You don’t have to seal them, but it’s a very good idea if you want to protect your investment. Unsealed pavers are vulnerable to stains from things like oil, fallen leaves, or a spilled glass of wine. A good sealer acts as a protective shield that also makes the colors of the stone look richer and prevents them from fading in the sun. Without it, your pavers will show wear and tear much faster and become more difficult to clean over time.
What’s the difference between a “wet-look” and a “gloss” sealer? This choice is all about your personal style and the final look you want. A “wet-look” sealer is designed to deepen and enrich the natural colors of your pavers, making them look vibrant and saturated, similar to how they appear right after it rains. A “gloss” sealer also enhances color, but it adds a noticeable shine or sheen to the surface for a more polished, reflective finish. If you prefer the original, natural appearance of the stone, a matte sealer is your best option.
My polymeric sand is installed. How long do I actually have to wait to seal? Patience is everything with this step. While the sand might feel hard to the touch in a day or two, the pavers and the base underneath are still releasing moisture. We strongly recommend waiting at least 30 days, but waiting 60 to 90 days is even safer. This gives the pavers time to breathe and release any natural mineral salts, which look like a chalky film. Sealing too early is the number one cause of a cloudy finish, so giving it that extra time is worth it for a perfect result.
Can I just top off my old polymeric sand, or do I need to remove it all before resealing? For the best and most durable results, you should remove the old, failing sand before adding new material. Simply topping off the joints can create a weak bond that won’t set properly and will likely fail again quickly. A pressure washer can often blast out the old sand and clean the pavers at the same time. It’s more work upfront, but it ensures the new polymeric sand can lock in correctly and create the stable, weed-free surface you want.